|
|
|
|
|
Scooter Motique | home
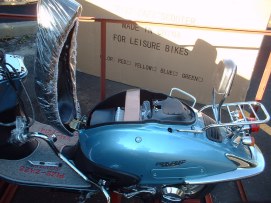
  All Pro Modena 125cc Scooter / Customer Prep Help Tips
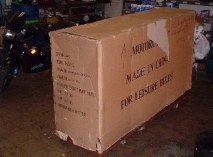
ARRIVAL: Your scooter will arrive in a pallatized wood, steel and cardboard shipping carton.
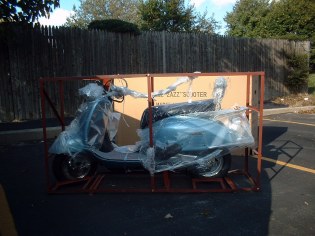
  UNPACKING AND INSPECTION: Remove the cardboard cover and inspect the scooter carefully. Check for any shipping damage BEFORE the trucker leaves. In the unlikely event that there is some damage, note the damage on the paperwork that the shipper will have you sign. If the damage is more than slight, call us immediately.
Check the interior of the cardboard cover as well as under the seat for documents. These documents may be taped to the scooter seat as well.This envelope contains your MSO (Title) and Bill of Sale.
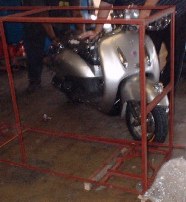
REMOVAL FROM CRATE: Once you have removed the cardboard cover and removed shipping hardware and strapping, carefully remove the scooter from the metal frame.
 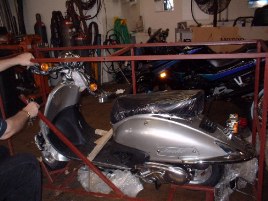  ASSEMBLY: The handlebars will be wrapped and secured for shipping. Remove the wrapping and carefully reposition the handlebars onto the bracket and secure with four (4) 10mm chrome bolts provided. Secure the guage cluster in place with bolts provided.
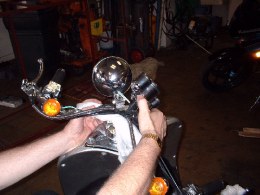  Loosen the two hex head bolts on the brake master cylinder bracket and slide the assy' onto the right handlebar end. Move the assy' up enough to give ample room to install throttle grip next.
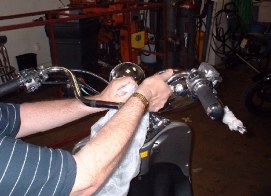
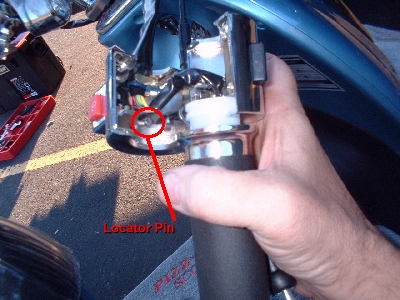
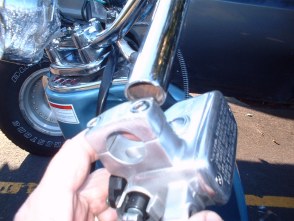 Unscrew the two screws that hold the throttle assy' together.
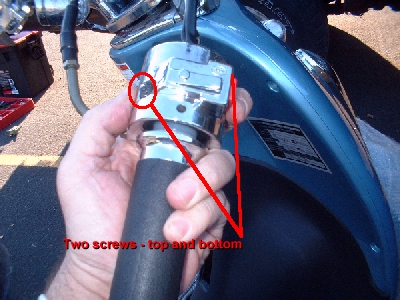 The Locator pin fits into a drilled hole on the bottom side of the handle bar to locate the throttle assy' properly. Fit the Locator pin into the whole and refasten the two throttle assy' screws.
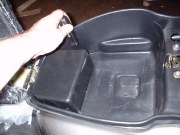
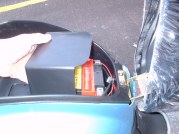
 PREPARATION: Unlock the under seat storage compartment. Remove the items stored for shipping within.
 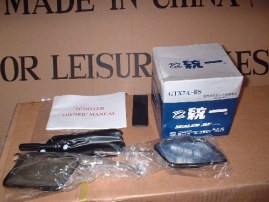 Battery, mirrors, tool pouch, documents and owners manual etc.
BATTERY PREP: Battery preparation is made easy by an ingenious electrolyte dry fill method. Follow the instructions provided with the battery.
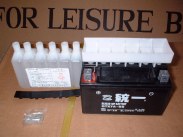 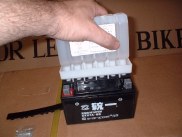  Once the fluid is installed the battery should have enough power to start the scooter. However, it is reccomended that the battery is charged for 6 to 8 hours using an automotive type charger at 2 amps.
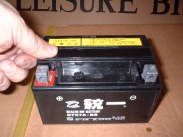
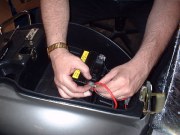
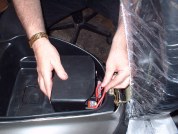
BATTERY INSTALLATION: Remove the battery cover. Locate the red and black wires. Attach the RED wire to the POSITIVE (+) battery terminal. Attach the BLACK wires to the NEGATIVE (-) terminal. Check the fuse and connectors for secure attachment. Place the battery in the battery compartment. Replace the battery cover and check for proper placement of wiring before tightening cover to prevent crimping of wires.
    STARTING THE MOTOR: You should now be ready for a preliminary engine start and system check. The brake handle (s) must be engaged in order for the engine to turn over and start. Insert the ignition key and select the start position, turn the key to the right.
While holding both brake levers, (the brake must be set in order to turn over the starter motor, a safety feature) push the start switch on the right hand switch plinth.
The motor should turn over by the starter motor engagement. Twist the throttle slightly and release. It may take considerable cranking before the fuel reaches the ignition chamber.
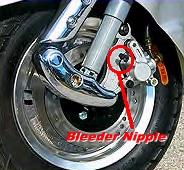
BLEEDING THE FRONT HYDRAULIC BRAKES: If you are not familiar with or are incapable of following this procedure you should seek competent assistance in order to remove the air from your front brake system in order to operate the scooter safely.
Proceed as follows: Pump the right brake lever several times and then hold the lever in the fully depressed position. While fully depressed, open the bleeder nipple slightly to allow air and fluid to escape. Tighten the nipple fitting before releasing the brake handle. Repeat this process several times untill ll the air is removed from the system and only fluid is seen at the bleed fitting. You should feel a firm 'pedal' or resistance at the brake lever.
Be sure to provide a proper container to catch the fluid that will come out of the nipple.
Be sure not to release the brake handle while the bleed nipple is open.
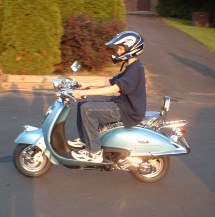
 PREPARING TO RIDE: At this time you should be ready to test ride your scooter! Check all bolts, screws and fittings for tightness. Check the air pressure reccomendation printed on the tires and make sure the tires are properly inflated. Adjust your mirrors. Allow the motor to warm up before applying throttle.
 Assistance is available by telephone email or fax. Contact your Dealer or Distributor.
ALWAYS WEAR PROPER HELMET AND OTHER SAFETY GEAR WHEN RIDING YOUR SCOOTER! ENJOY!
 |